Sway

Sway is a Microsoft application that allows for creating and sharing interactive reports, presentations and documents.
Capable of holding documents and images of large file sizes, we recommend the use of Sway when delivering information relevant to site content in conjunction with some of our other online site visit applications such as Kaltura and H5P.
Sway is compatible with Canvas and enables an in-built file sharing platform with a visual display.
You can test a live example of this method within the ABP BEL+T Canvas Community. Click here to access. If you have not yet enrolled into the ABP BEL+T Canvas Community click here first.
When to use Sway?
- When sharing large file size formats to students. Often images or video footage that are supplied to build 360 imaging.
- Sharing folders of high-resolution site visit photos.
Account and Accessibility
As part of the Microsoft office package, all students and staff member will be able to access Sway through their University of Melbourne account.
Setting Up Sway
In this guide, we will go through the steps to navigate and set up Sway for the purposes of file sharing on Canvas.
Additionally, a link will be provided, where users may duplicate a template format provided by BEL+T for ease of setup.
Step 1. Welcome to Sway
- Open Office Home in your web browser and enter All Apps to find Sway.
- + Create New to start Sway in which to upload files.
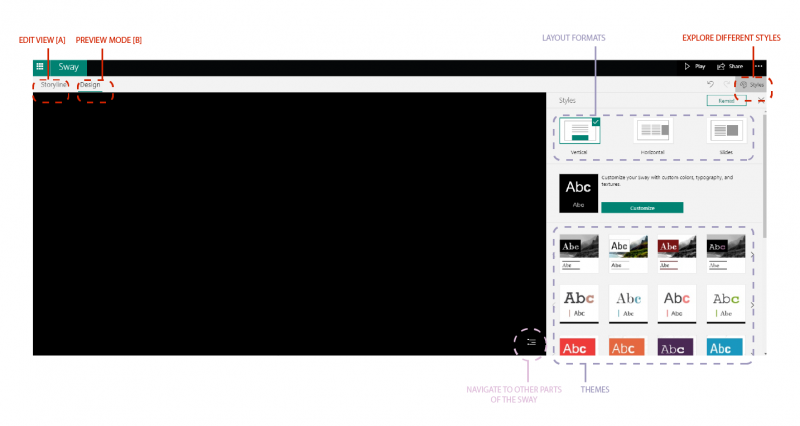
Step 2. Sway Interface
Switch between [A] Storyline, and [B] Design views to see your final layout as you edit.
[A] Storyline View
Use the Storyline View when uploading files and adjusting settings for individual images.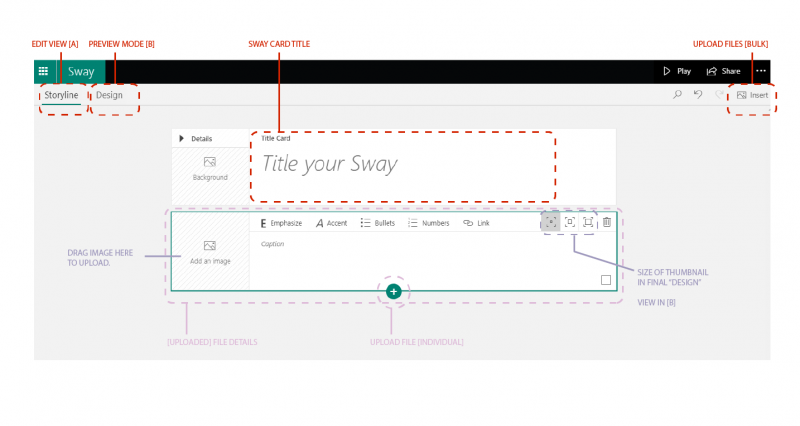
[B] Design View
The Design view will show a preview of what the interface will look like from the user end, and can be accessed to change the layout formats.
Uploading Content
Step 1. Upload Files [Bulk]
- Enter Storyline View
- Find the Insert button in the top right corner of the page to upload content to your Sway.
- Use the suggested search bar to browse for images online, or upload directly for your device, or OneDrive.
- Select your images to upload, and click Add.
- Alternatively, use the [+] button to individually upload files.
- Write a caption if desired.
Step 2. Upload Files [Individual] + Apply captions/view settings
- Enter Storyline View
- Alternatively, use the [+] button to individually upload files.
- Write a caption if desired.
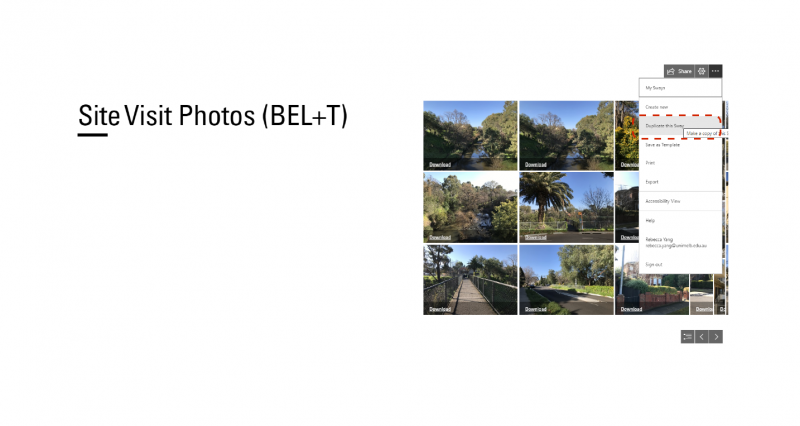
Duplicating Sway Cards
Access the BEL+T template by following the link below:
https://sway.office.com/XJ4UaxEUqYeVcDGO?ref=Link&loc=play
- Click the three dots […] and find Duplicate this Sway to create a copy in your own Sway boards.
Embedding Sway into Canvas
Step 1. Open Sway
- Enter the Storyline View
- Click Share and find </> Get Embed Code from the drop down menu.
- Copy to Clipboard

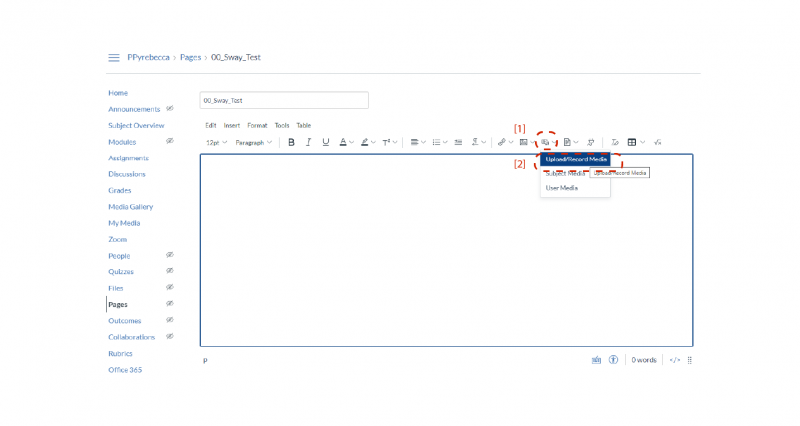
Step 2. Open Canvas
- Open you canvas page and enter the Edit view.
- Upload/Record Media by clicking button [1] as shown in the image below.
3. Embed code and submit.
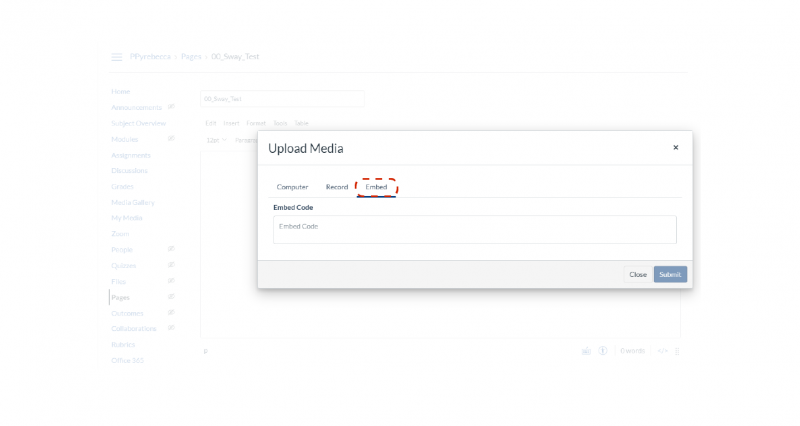 4. Save the canvas page to make sure the interactive link is working.