Linking + Navigation
Linking + Navigation Overview
| How-To: Link existing Pages and create Navigational Objects |
Existing content such as Module pages, Lecture Capture, Assignments, etc and external content such as PDFs, Word documents, software files (etc.) can be neatly integrated into a page to improve navigation and content accessibility.
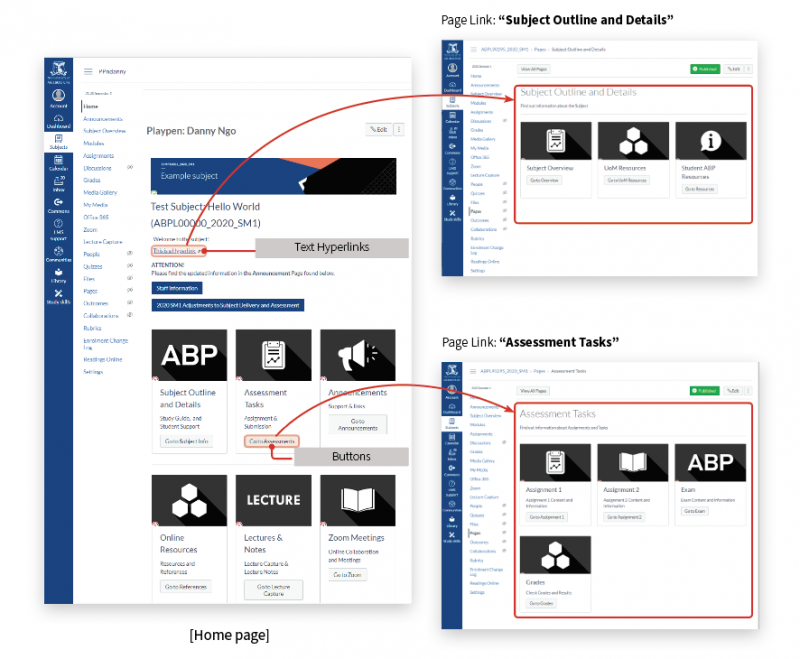
Navigational objects take the form of text links, buttons and tile images. These navigational objects can help users/students quickly find useful information and help instructors convey information quickly and effectively.
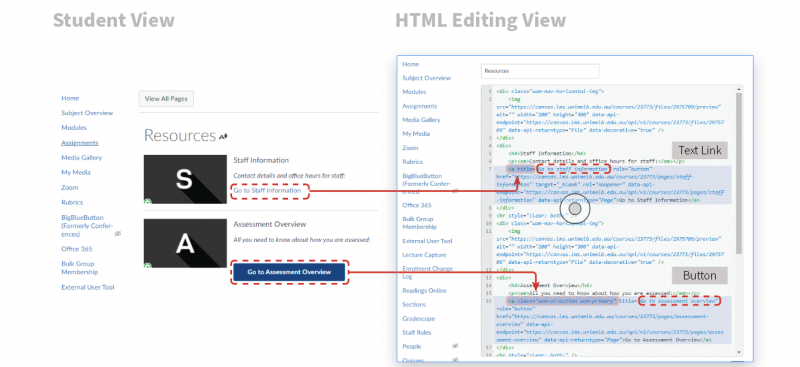
1| Text Links and Buttons.
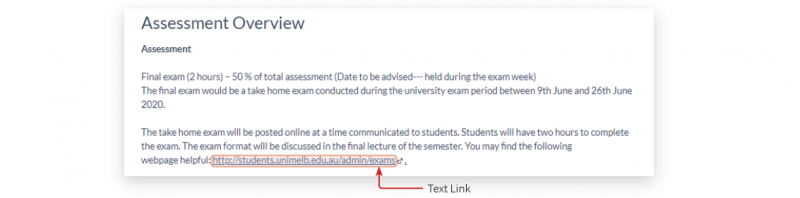
Text Links
Strings of text can be linked and act as an internal hyperlink enabling instructors to integrate various sources and/or downloadable content (i.e. PDF, Word doc and images, etc.) into the page.
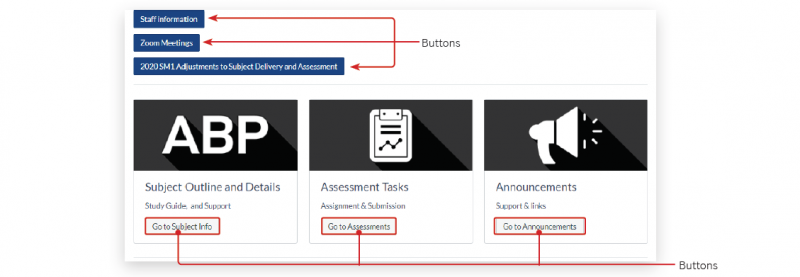
Buttons
Buttons functionally work the same as text links but are aesthetically presented as a button. This navigational object is useful to distinguish them from links directing users to external pages.
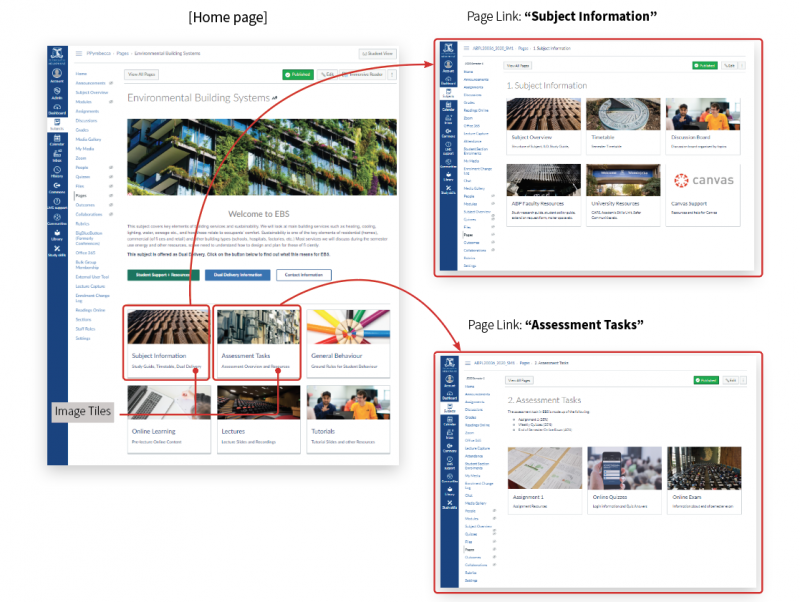
2| Image Tiles
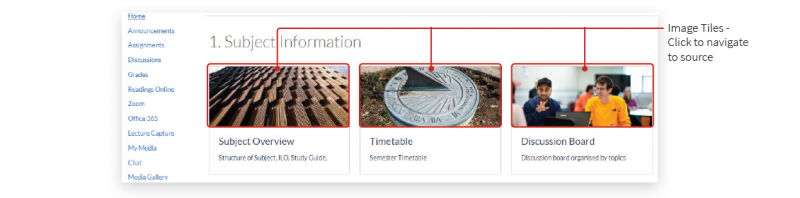
Images
Images can be integrated with a source link to function as both an image and a hyperlink. This method can be achieved through the Rich Text Editor; however, complications can occur when changing images. This method is better suited to HTML coding (see How-To: Link Images via HTML)
Converting Text Links + Buttons
| How-To: Convert Text Hyperlinks into Buttons and vice versa |
Linking pages through the Rich Text Editor will change the aesthetic language of the text link respectively.
[1] Button: Linking external websites by using URL addresses will convert a text link into a button.
[2] Text Link: Linking internal pages through subject links and embedding external documents such as PDFs and Word documents will convert the selected string of text into a clickable hyperlink.
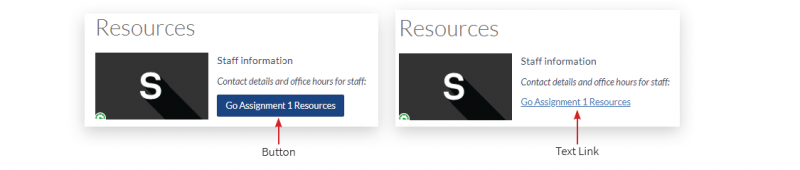
These navigational object changes can be altered through the HTML editor, converting a text link to a button or vice versa.
Step 1.
Look for the container that holds the string of text and ADD the following code <class="uom-ui-button uom-primary uom-ui-button--short">
Note: To change the colour of the button, replace the code "uom-primary" with either "uom-secondary" (light blue button) or "uom-success" (green button).
Light blue button code: <class = "uom-ui-button uom-secondary uom-ui-button--short">
Green button code: <class = "uom-ui-button uom-success uom-ui-button--short">
Please note that the two hyphens in the code "uom-ui-button--short" are intentional.
Fixing Links after Changing Page Name
| How-To: Fix broken links after changing the name of a page |
After editing the name of a page, the links to that page (buttons/hyperlinks/tiles) may be broken.
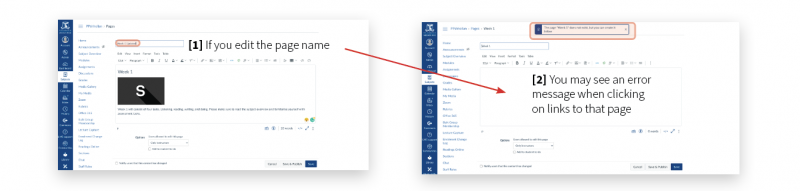
When the name of a page is updated, all links that go to that page must also be updated manually.
Step 1.
1| Select the broken link and click Remove link.

2| Select the arrow next to the Links button in the top-middle section of the page, and select Subject Links.
3| Create a new link to the desired object (page/quiz/module).
Linking Content via Image Tiles
| How-To: Link Tiles to existing Content [i.e. Modules/Pages] |
Content can be linked via image tiles to enhance visual clarity whilst improving the accessibility of information and resources.
Editing and modifying tiles can be achieved through the Rich Text Editor. However, changing the images of tiles may remove the link that is associated with that tile. To avoid this, modify images through ‘subject files’ and/or editing this through HTML coding.
Linking Pages via Image Tiles
| How-To: Link Tiles to existing Content [Pages] |
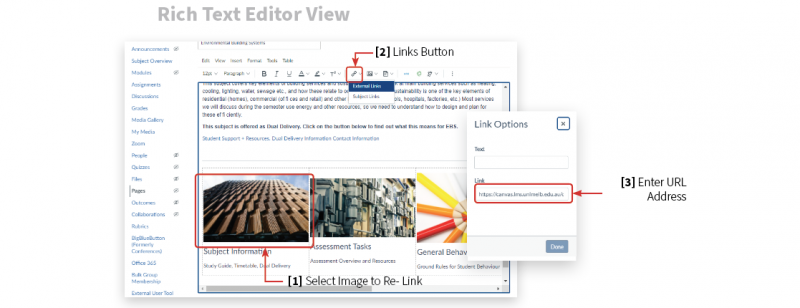
1| To link image tiles to external links enter the Edit view.
Select (highlight) the image to be linked (point of access) and locate the link button on the toolbar.

Enter the URL address of the external website or existing page within your Canvas subject website. The URL address can be found in the top of the web browser.
2| Updating and Modifying Image Links.
Re-linking images can be done by selecting the existing image tile and locating the same link button on the toolbar.
Linking Modules via Image Tiles
| How-To: Link Tiles to existing Content [Modules] |
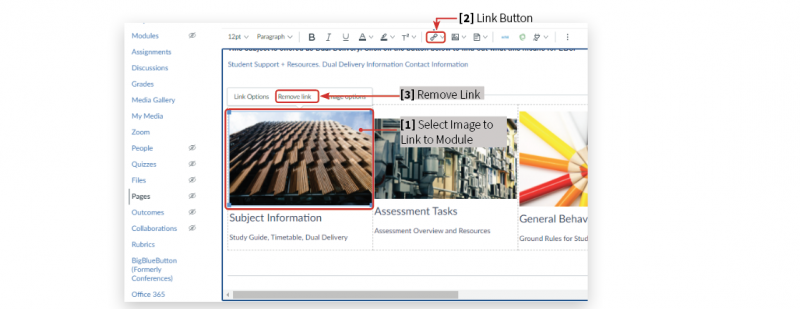
1| To link image tiles to existing modules enter the Edit view.
Select (highlight) the image to be linked (point of access) and locate the Link button on the toolbar.

To link to existing Modules, select Subject Links to allow a list of available Modules to pop up. Select the appropriate module and click done.
2| Removing Existing Linked Images
Access to Subject Links is only available when there is no link associated with the tile image. To remove existing links, click on the links icon found on the toolbar and select Remove Link.
Linking Content via Text + Buttons
| How-To: Link text and buttons to existing content [i.e. Modules/Pages] |
Linking and embedding content enables quick access to pages and provides extra information whilst keeping the page neat and tidy. This can be done by incorporating text links and buttons.
Adding/Removing/Modifying text links and buttons can be done through the Rich Text Editor and does not require HTML coding.
Linking Pages via Text + Buttons
| How-To: Link Tiles to existing Content [Pages] |
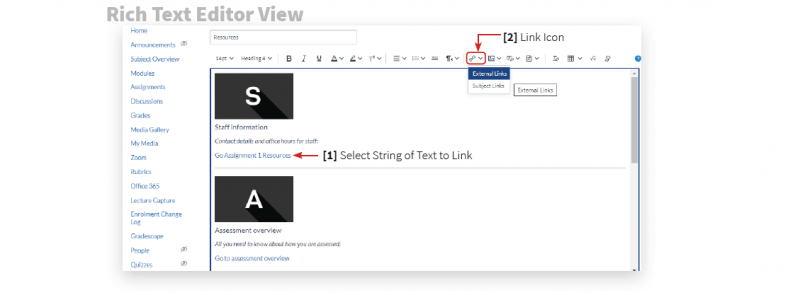
1| Link tiles to existing or new Pages and Module items by entering the Edit view.
Select (highlight) the string of text you wish to create as the hyperlink (point of access) and locate the Link button on the tool bar and select External Links.
2| Alternatively, to modify existing linked items, select the hyperlink, click Options and update the Link URL. These external links can be located in the External page’s address bar (top of the web page).
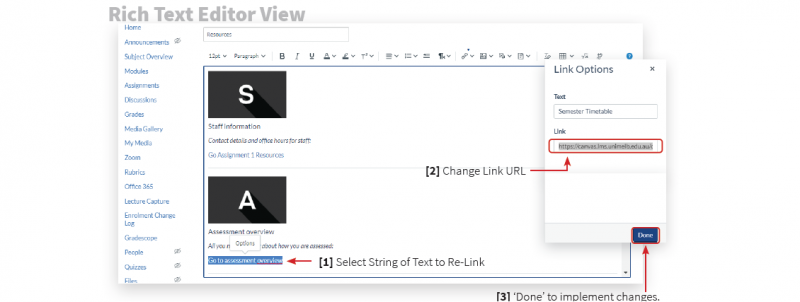
NOTE: Editing or changing URL links may convert selected buttons into text hyperlinks. When this happens, text hyperlinks are only able to be changed back into Buttons using the HTML editor. Please view the How To: HTML Section of this guide for more details.
Linking Modules via Text + Buttons
| How-To: Link text+buttons to existing Modules |
1| To link tiles to existing Modules enter the Edit view.
Highlight the string of text you wish to create as the hyperlink (point of access) and locate the Link button on the tool bar.
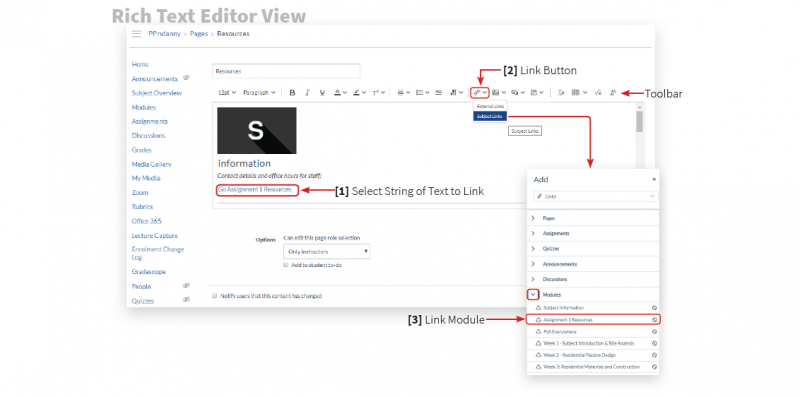
To link existing Modules, select Subject Links to bring up a list of available modules. Select
the appropriate module and click Done.
NOTE: If you have a link already assigned to the string of text, you can remove this by clicking the same link icon found on the tool bar and select Unlink.