Interactive Static Images in H5P
Follow these steps to create a Virtual Site Visit using conventional digital photographs. This method only requires images of your chosen site acquired with a conventional camera. With this method, you will be able to digitally overlay key information via the use of hotspots.
H5P allows you to create rich interactive content easily and quickly. Staff can create a H5P account within the UoM domain and synchronise it to Canvas. For instructions on how to do this see Learning Environment's H5P guides.
You can test a live example of this method within the ABP BEL+T Canvas Community. Click here to access. If you have not yet enrolled into the ABP BEL+T Canvas Community click here first.
When is it best to use Virtual Tours (with static images) in H5P?
- When you have captured your site in image format.
- When you would like to overlay content on images (i.e. detailed images, links, videos, text).
Considerations to keep in mind:
- In this format, navigating between images across a site can be disorienting for the user. To avoid this problem, we recommend creating a virtual tour for each individual space within your site.
Creating Virtual Tour content in H5P with conventional photographs
- Login in to your Unimelb H5P account using the following instructions.
- To create new content, click the Add Content button .
- Select Virtual Tour (360°) from the displayed list or, alternatively, type "Virtual" in the search bar. While we will not be using 360° footage, this option is suitable for creating conventional (non-360°) tours.
- Click and read the details. Then click Use once you are ready to implement.
Adding images and scenes
- To create a new scene, click the 'New Scene' button found below the display window.
- Select Static Image and fill in the details.
- Click on the Add button below 'Scene Background'. Then locate the image from your file directory of your local desktop.
Editing a scene
Once uploaded, images can be cropped or rotated to suit the content.
- Choose a scene to edit from the drop-down menu found below the display window. Hover over the scene and click the 'Edit' icon.
- Click the 'Edit image' button underneath the image thumbnail.
- Crop or rotate the image by clicking the icons in the Edit Image toolbar. Click Save when you are happy with the edits.
- Click 'Done' to apply the edits.
Adding Hotspots
Hotspots are clickable icons or elements that you can integrate into a scene to make it interactive. The image below shows a range of different hotspot options.
- To add a hotspot to a scene, click the desired icon from the toolbar (see image below).
- Follow the prompts and fill out any necessary information, then click 'Done'.
- A hotspot icon will appear on the image. Click and drag the icon to place it where you would like it to appear within the interactive scene.
- Click 'Save'.
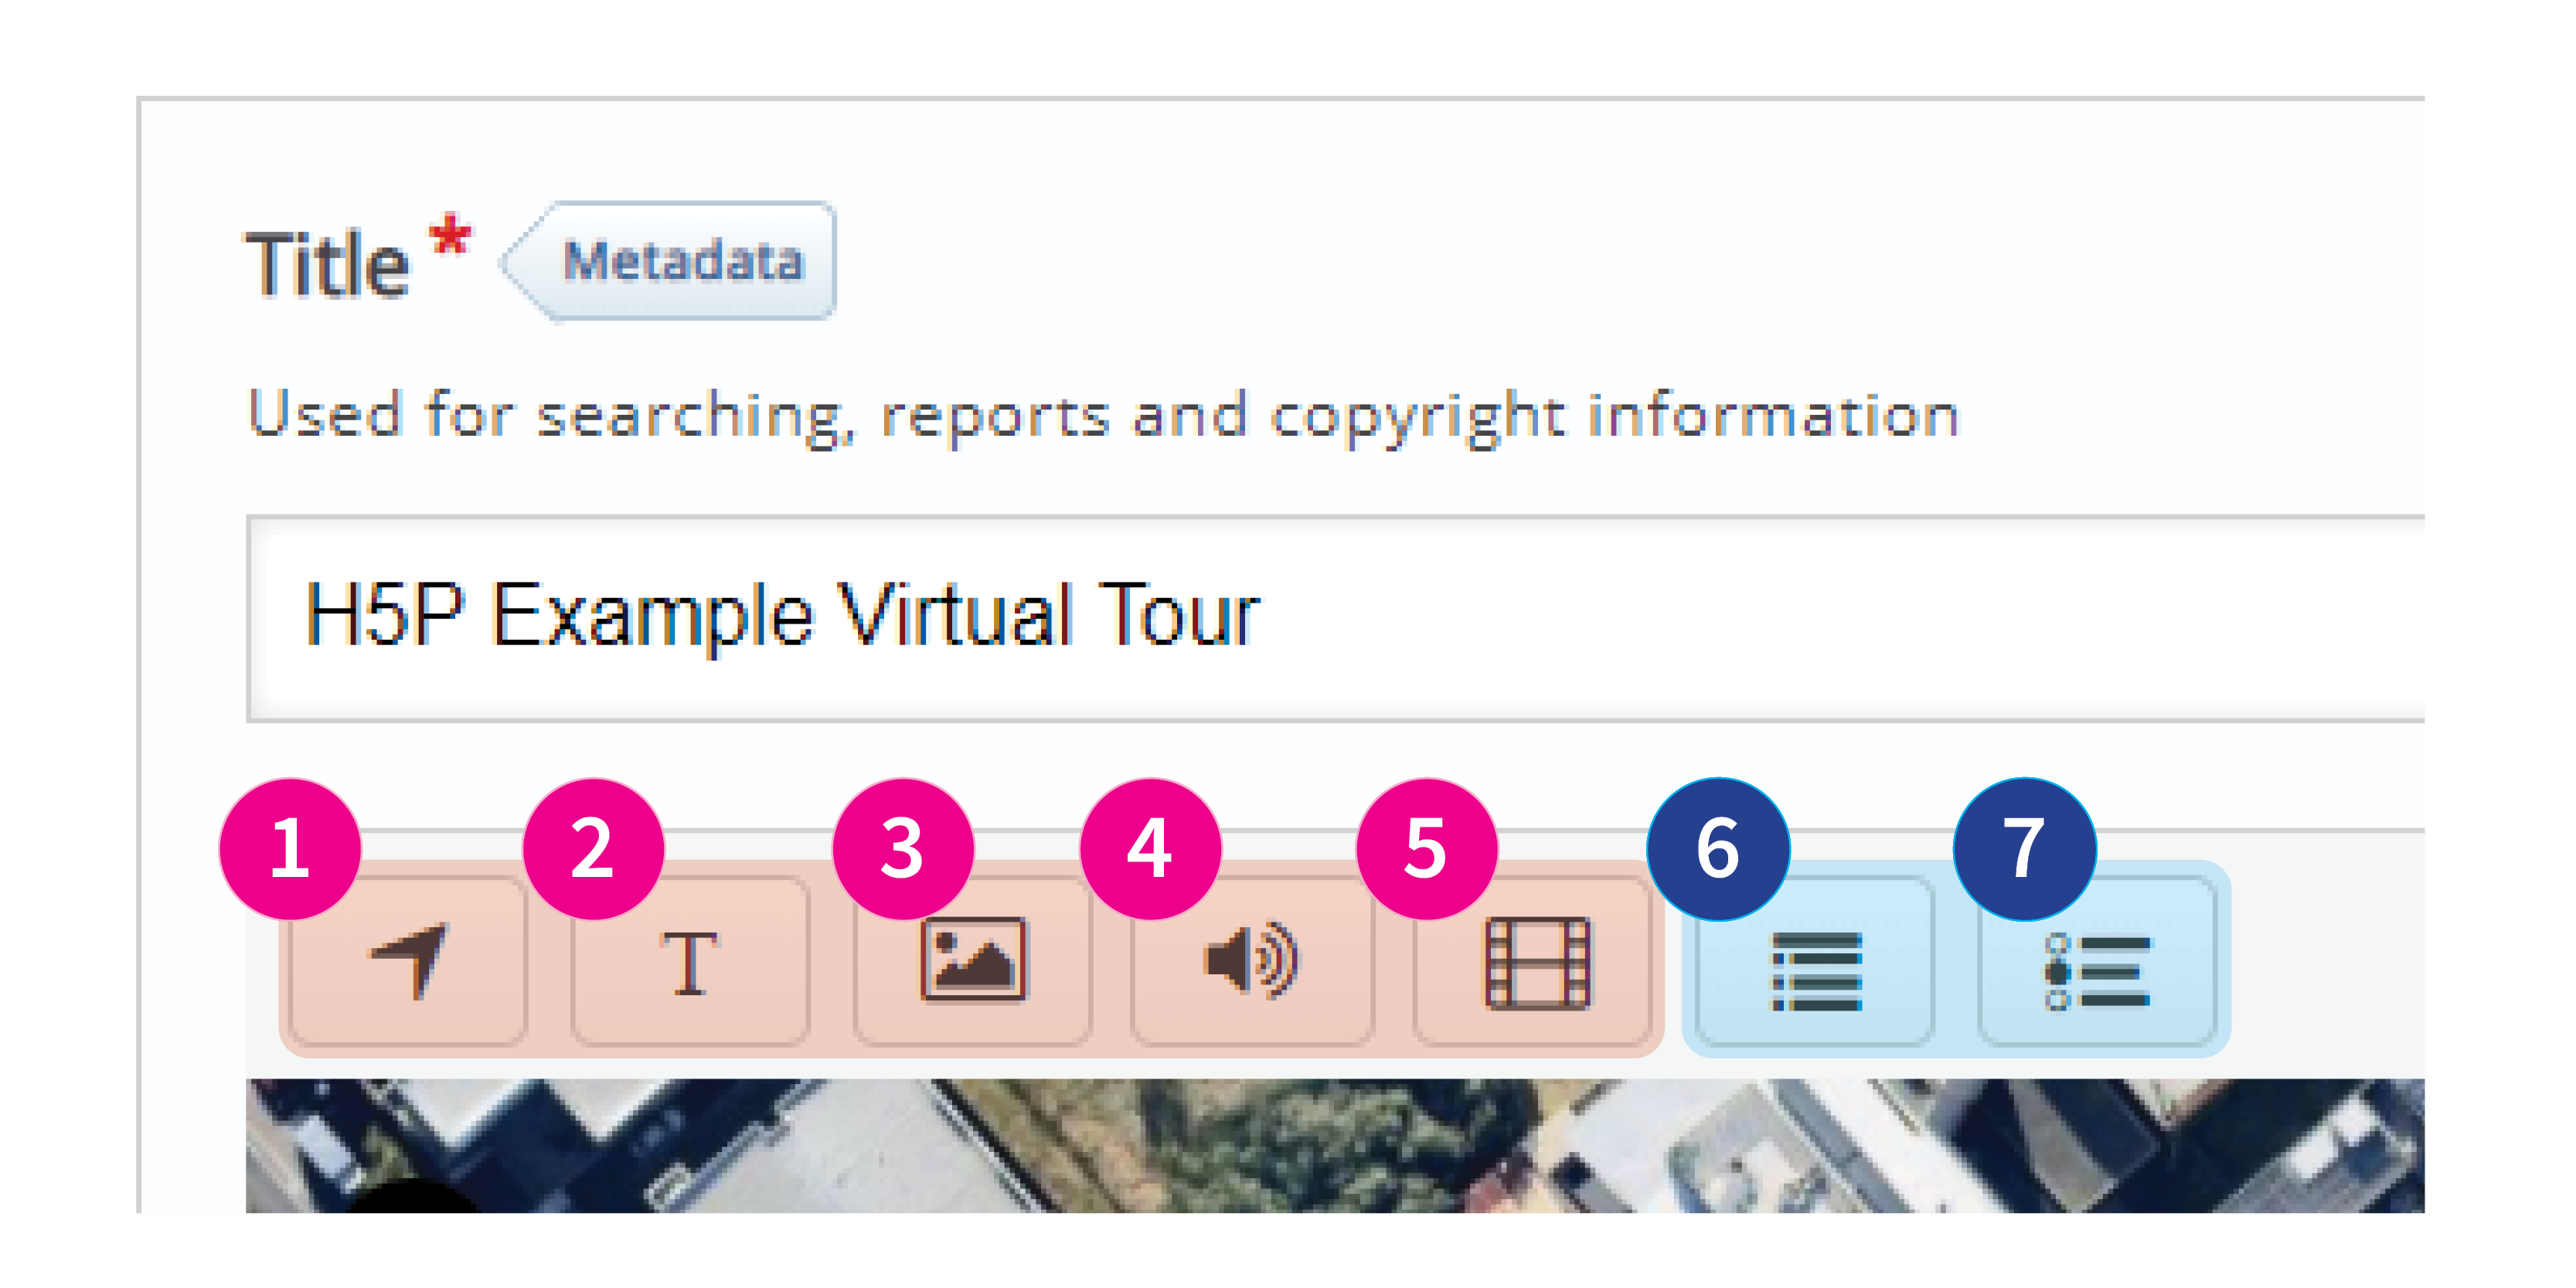
Location hotspots allow users to portal to other scenes within the workspace. | |
|---|---|
Text hotspots display important information and details as textstrings. | |
Image hotspots display images from your local computer and can be useful for exposing key visual details. | |
Sound allows you to embed audio recordings. | |
Video hotspots enable video playback through either uploaded media files or external links. | |
Summary questionnaires assess user comprehension. | |
Single-choice questionnaires are a multiple-choice selection that responds to an overarching question. |
Embedding H5P to Canvas
Once you have created a Virtual Tour (360) using H5P, it is possible to embed it within a Canvas site.
- Create a new page or find the page on which you would like to embed the interactive H5P scene. Click ‘edit’.
- Within the Rich Text Editor toolbar, click the 'apps' icon.

- Select the H5P app, then select the content you would like to embed.
- Save your page edits. You can now interact with the H5P content within the Canvas page.