Editing, Inserting + Uploading Images
Editing Image Tiles
| How-To: Add, Remove and Edit Images |
Step 1.
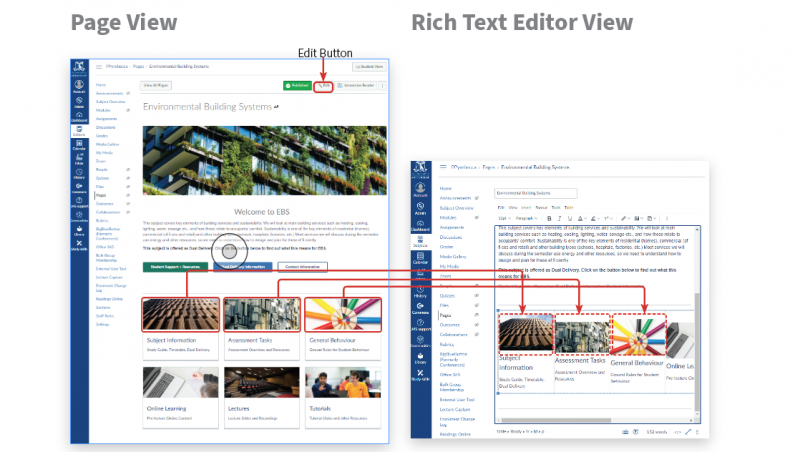
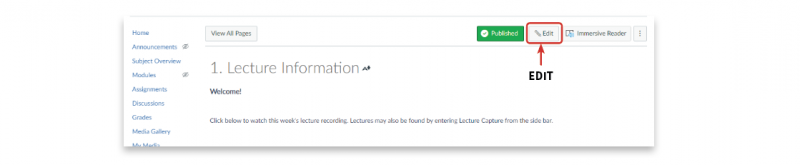
Locate the desired page and select Edit in the top right hand corner. Once in the Rich Text Editor view, you are able to add/remove/edit images.
Resizing Images
| How-To: Resize Images to fit Template conventions |
Resizing images can be done within the Rich Text Editor.
There are two different ways to resize an image:
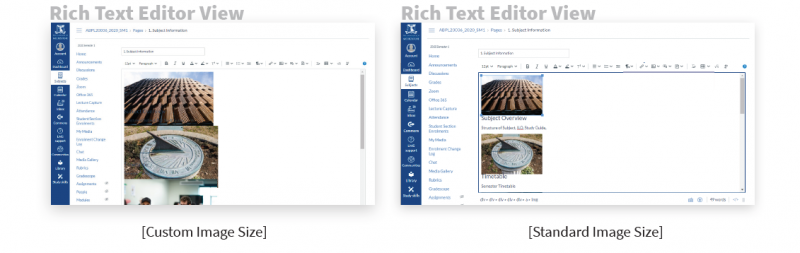
[1] Standard adjustment ratios can be easily done by selecting and adjusting the image, while custom adjustments require manual input.
[2] Custom adjustments should only be used when there are odd or unconventionally sized images, as in displaced or offset tile images.
Step 1.
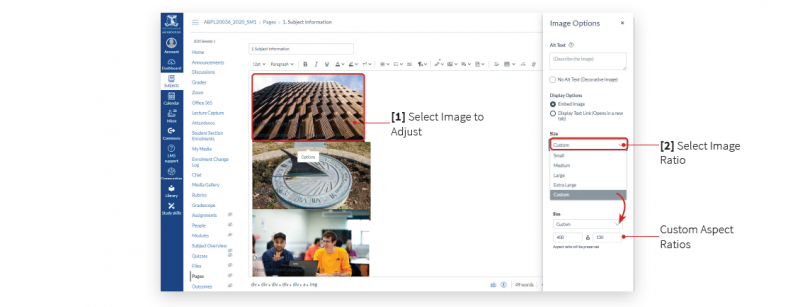
To adjust the image size, click on the image in the Rich Text Editor and select Image Options.
Tile Images
Please note that the size of images within Tiles will always show at a constant size on the live page, regardless of what size they appear to be in the Rich Text Editor. Therefore, changing the size of an Tile image in the Rich Text Editor will not affect how it is displayed on the live page.
However, it can be convenient to reduce the image size of very large Tile images to aid workability in the Rich Text Editor. This can be achieved using the process described above.
Inserting Images from PC
| How-To: Customise my own Tiles and add relevant Images |
Changing images on a page can be done through the Rich Text Editor and linked through images found on your PC.
It is important to also note that this method may remove any currently linked image sources.
Step 1.
Upload images/files directly from your PC.
Step 2.
Locate the file on your PC and upload.

Uploading Content to Files
| How-To: Add/Upload content to my Canvas Website |
1| Uploading Images To Files
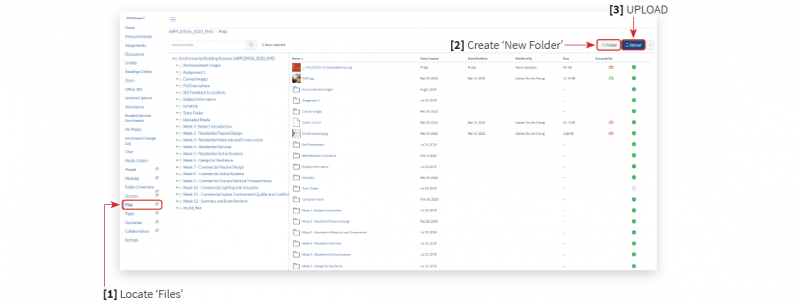
Step 1.
To upload images and documents to the subject content, locate the Files page on the left hand side view (see below).
Step 2.
Once you are in Files, create a folder to locate the images/documents and simply click Upload (top right).
Alternatively you can click and drag files from your PC onto the web page.
Inserting Images from Files
| How-To: Insert and use Images already on my Canvas Website |
Inserting images from Files involves selecting images from the subject’s File Library.
It is important to also note that this method will not affect the current link or associated images.
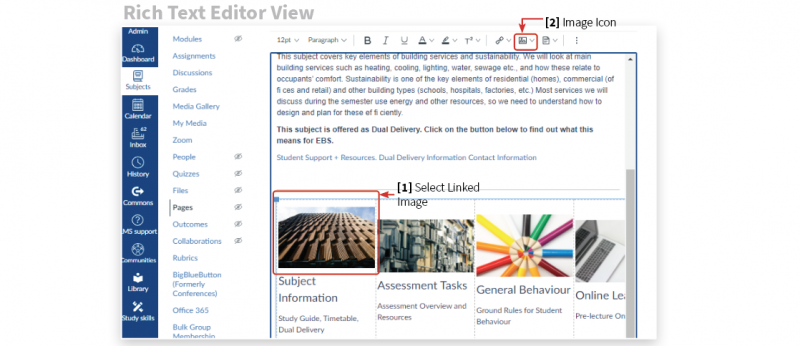
Step 1.
1| Select the image you would like to replace or the position you would like to insert a new image.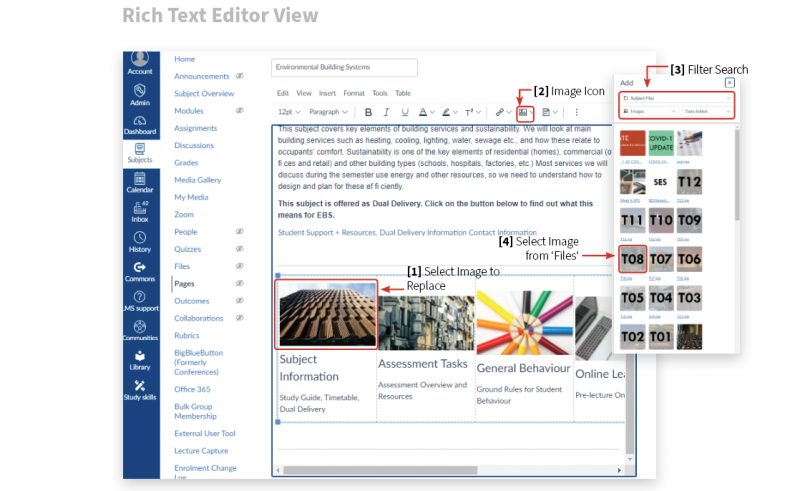
2| Select the Image Icon.
3| Select the Filter Search and enter the file name of the image you would like to insert.
4| Select the image you would like to display.
Embedding Videos Into Pages
| How-To: embed videos from Echo360 as page content|
Videos uploaded, or recorded through Echo360 can be accessed and embedded through functions found in the toolbar of the Rich Text Editor. This method can be used for uploading content created using other learning tools applications, including Kaltura, H5P or Youtube.
Step 1.
Locate the desired page and select Edit in the top right-hand corner.
Step 2.
Once in the Rich Text Editor view, find the Apps button in the top-right hand corner of the toolbar. Select the arrow next to the Apps button and click View All.
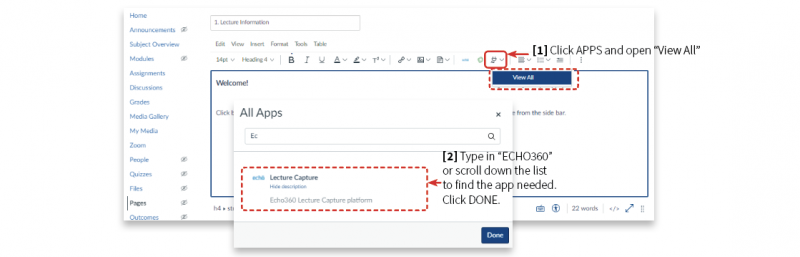
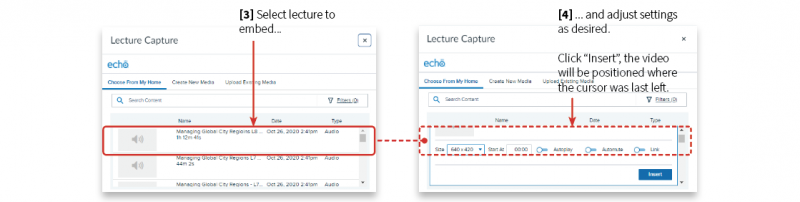
Step 3.
Select the videos to embed from your Lecture Capture library. To add or modify video content, select Lecture Capture from the Canvas sidebar.